Virtually everything in Another Star but the map layouts and base graphics were hard coded directly into the game. For some things, like item stats, this wasn’t too bad so long as I kept the code organized. For others, like which graphics were used to build individual map tiles, it was an absolute pain whenever something small had to be changed, and usually required me to physically count offsets and coordinates to figure out what belonged where.
Since Another Star 2 is planned to do fun and weird things with palettes and tile layouts, I thought it best to spend some time up front getting a good selection of tools programmed that would help create the game more easily. Most of these tools take the form of a program called ROM Architect.
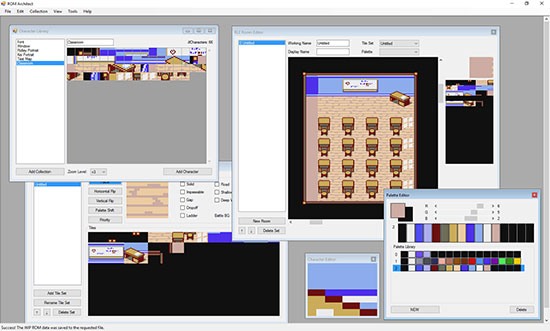
ROM Architect is programmed in C# and makes extension use of WinForms. This makes it pretty easy to throw things together and make them work without the rigid hassles of hooking them all up using C/C++ headers.
Let’s take a quick look at ROM Architect’s various components.
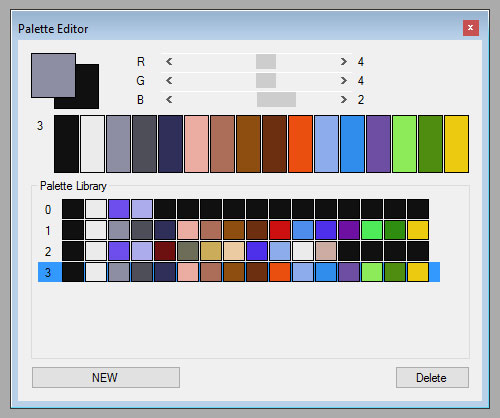
The palette editor is pretty straightforward. It lets you build and preview sixteen color palettes built from the game’s 8-bit BBGGGRRR color scheme. The palette at the bottom is a recreation of the original Another Star’s sole sixteen color palette.
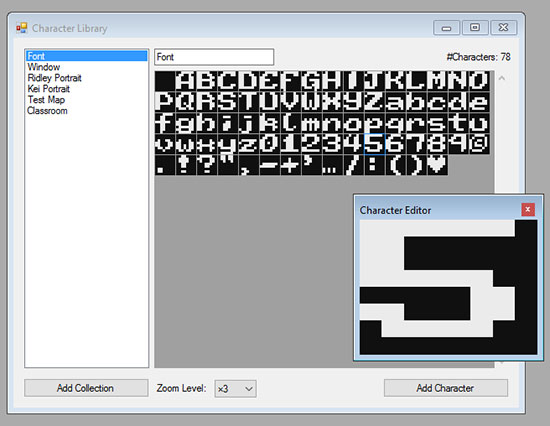
The character library and character editor are used to build and manage the 8×8 pixel graphics that are used to build pretty much everything in Another Star. If I was using modern sprite sheets, this would not be necessary, but I thought it’d be more interesting to try and build everything faithfully to the system limitations of the time.
Of course, it’s pretty hard to build larger graphics while only able to focus on a single 8×8 pixel block at a time, which is why I implemented a copy & paste feature.
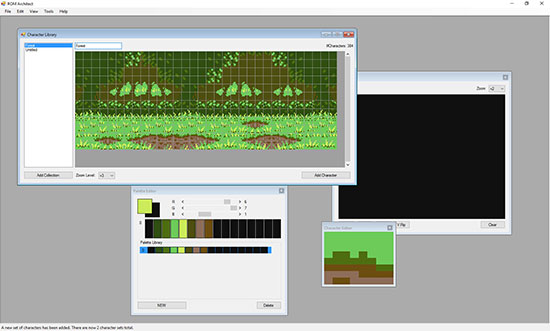
I can build everything in Photoshop, then select what I want to bring over using CTRL+C (well, CTRL+SHIFT+C, since I’m usually copying multiple layers). All I have to do then is recreate the palette in the editor, then paste to the character library. No exporting or importing of files required. ROM Architect will handle breaking everything up into 8×8 pixel chunks and do its best to match color values to fit the current palette. You can see the results above.
The character library even has an automated tool that I can select to then go through everything I just put in it to remove all the duplicates (including those that are flipped/mirrored, if I so choose). From there, I can make further reductions manually as needed.
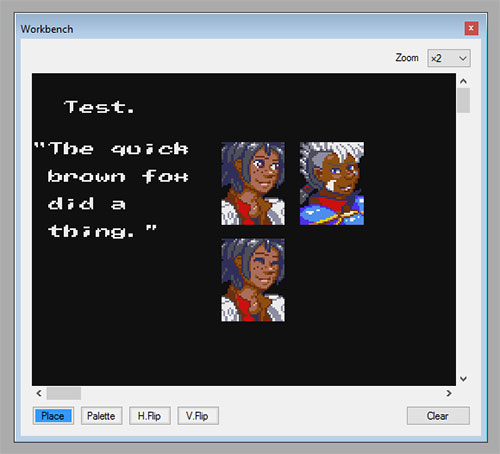
Character layouts can be tested on the Workbench, which exists solely to let me mess around with graphics and see how they fit together without disturbing anything else.
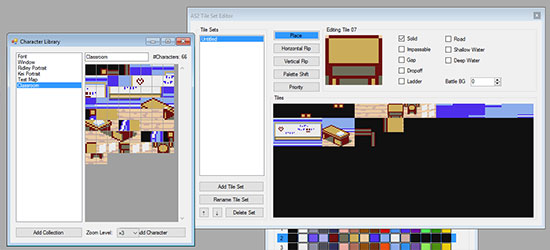
In Another Star 2, all tile sets are 128 tiles in size. This was actually a pretty common tile set size up through the 16-bit era (it let you use the other 128 values of a byte as controllers to do map compression). The Tile Set Editor not only lets me lay the tile’s graphics out by placing characters from the library, but I can also change each tile’s properties.
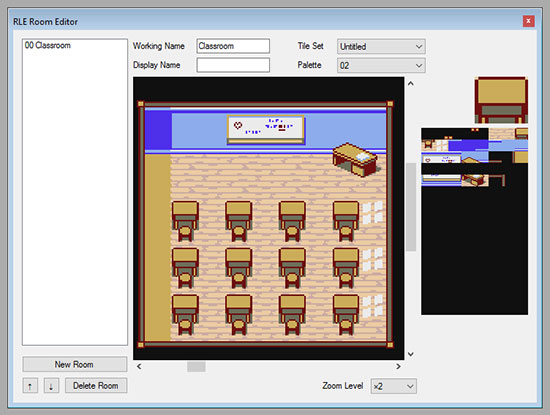
Here’s the RLE Room Editor, which I use to build maps using the tiles created in the Tile Set Editor. RLE stands for run-length encoding, which is how free form RPG maps were typically stored back in the day. An alternative scheme, more popular in platformers, is to create larger “meta-tiles” from the smaller tiles, and then build the level from those to save space.
You’ll notice that the Room Editor lets me select the palette. Palettes are independent of tile sets so that I can get a little more mileage out of them by simply changing the color scheme.
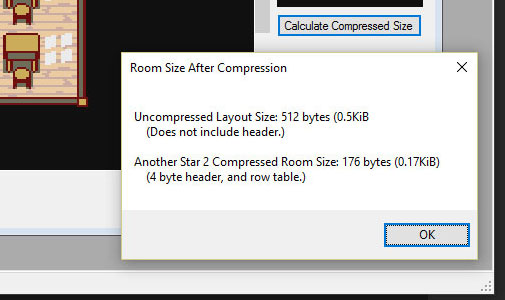
Here’s how much space I can save on this map using Another Star 2’s own RLE compression scheme. Whoo hoo! I saved almost 400 bytes!

You’re probably tired of mock-ups and tools at this point, though, so I’ll end this here. Next week I’ll finally start showing actual stuff from the engine in its early state.
